One of the many undisputed benefits of WMS is the ability to change the php configuration. In this article, we will explain how to change the configuration and what all parameters can be individually set to as compared to the offered NoLimit web hosting service.
Changing the php configuration
- Log in to the customer administration
- In the main menu, click on the WMS tab
- In the list, click on the required WMS which contains the created web hostings
- In the left menu, select the “Webhosting List” link.
- In the List of web hostings, click the desired webhosting for which you want to change the php configuration
- In the left menu, select “PHP Configuration“
- Change the required parameters as desired and click on the “Edit” button.


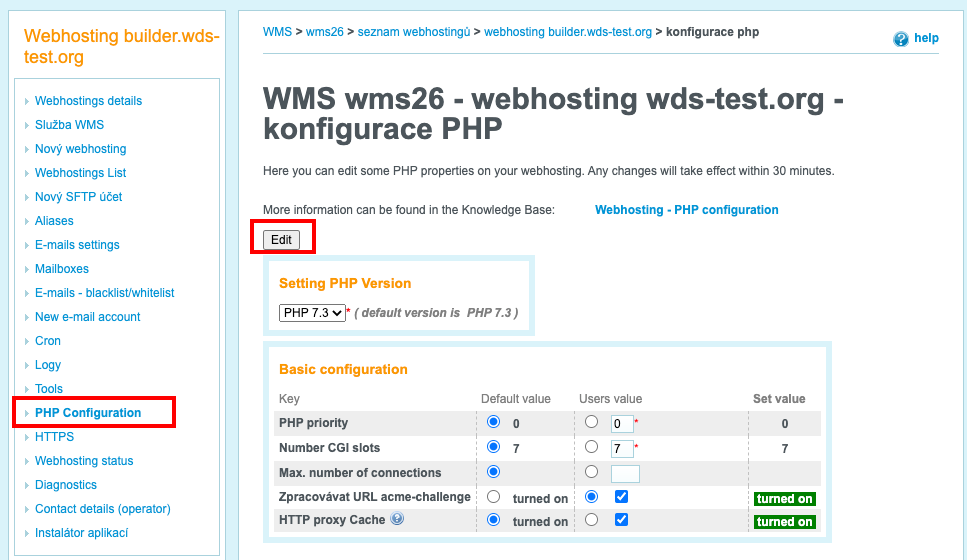
list of new configurations
The basic php configuration for NoLimit webhosting is extended through the WMS service by these parameters.
Basic configuration (the default values are in the brackets)
- PHP priority (0)
- Number of CGI slots (7)
- Max. number of connections (null)
- Process URL acme-challenge (on)
- HTTP Proxy Cache (on)
Settings in php.ini (the default values are in the brackets)
- max_input_time (30)
- max_input_vars (10000)
- memory_limit (128)
- opcache.enable (zapnuto)
- post_max_size (32)
- upload_max_filesize (32)